How to Self Host a Docker Registry
Now Unlimited and Private

Docker Registry is a registry for Docker images that is used by Docker Hub, but the problem with Docker Hub is that we get only one private repository for our image and in case we need multiple private images self hosting is a Docker registry in our existing server is the best option, and in this post, we will be doing just that.
Table of contents
- Requirements
- Notes in self-hosting a registry
- Install with Docker Compose
- Use NGINX as a proxy
- Conclusion
- Sources
Requirements
- Docker
- Docker Compose
- Basic understanding of Docker and Docker Compose
- NGINX
Notes in self-hosting a registry
There are two notes about self-hosting your own Docker Registry in production that I would like you to know.
- Using Docker Registry in a production environment requires a secure connection (SSL/TLS).
- It's best to proxy the registry through NGINX web server for more control and security.
After taking notes, we can start installing the registry.
Install with Docker Compose
We will be installing the registry using Docker Compose, for ease of use.
Create a docker-compose.yml file:
touch docker-compose.ymlPaste the following content into the file:
version: '3'

services:
  app:
    image: registry:2
    container_name: docker-registry
    restart: unless-stopped
    environment:
      REGISTRY_AUTH: htpasswd
      REGISTRY_AUTH_HTPASSWD_PATH: /auth/htpasswd
      REGISTRY_AUTH_HTPASSWD_REALM: Local Registry Realm
    ports:
      - 127.0.0.1:8000:5000
    volumes:
      - ./data:/var/lib/registry
- ./auth:/auth:roIn this file we describe our registry, using the local port 8000 and local volumes for our data and authentication (we will get into this below).
Since we specified our auth method to htpasswd (basic auth) we need to generate htpasswd file using this command:
docker run --entrypoint htpasswd httpd:2 -Bbn my_registry_user my_registry_password > htpasswdThis will create a file named htpasswd with content similar to this:
# cat htpasswd
my_registry_user:$2y$05$mexS70Ju7VkXag5X7EzDI.Mrt5JZPU5K3mh1oPL0oydhTj2HMpUk.
Now to make this work with our docker-compose.yml file we need to create the auth directory and move the file into it like this:
mkdir auth && mv htpasswd authOur file tree should look like this:
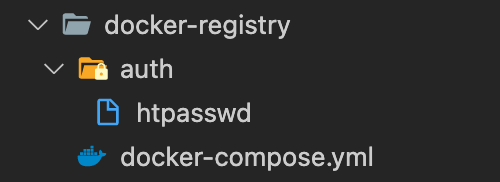
We are now done with the installation preparation, let's run the registry now:
docker-compose up -dCheck the logs to see if there are any errors:
docker-compose logs -fIf it's all good, move on to the next step.
Use NGINX as a proxy
In order to expose the registry to the internet, we will be using NGINX as a proxy web server.
For a specific domain or subdomain, we can use the following configuration:
upstream docker_registry_app {
    server 127.0.0.1:8000;
}

server {
    listen 443 ssl http2;
    server_name sub.domain.com;

    # ssl
    ssl_certificate /etc/nginx/certificates/domain.com.pem;
    ssl_certificate_key /etc/nginx/certificates/domain.com.key;

    # logging
    access_log /var/log/nginx/sub.domain.com.access.log;
    error_log /var/log/nginx/sub.domain.com.error.log warn;

    client_max_body_size 0;

    # reverse proxy
    location / {
        proxy_set_header Host $http_host;
        proxy_set_header X-Real-IP $remote_addr;
        proxy_set_header X-Forwarded-For $proxy_add_x_forwarded_for;
        proxy_set_header X-Forwarded-Proto $scheme;

        proxy_read_timeout 900;

        proxy_pass http://docker_registry_app;
    }
}

# https www redirect
server {
    listen 443 ssl;
    server_name www.sub.domain.com;

    # ssl
    ssl_certificate /etc/nginx/certificates/domain.com.pem;
    ssl_certificate_key /etc/nginx/certificates/domain.com.key;

    return 301 https://sub.domain.com$request_uri;
}

# http and www redirect
server {
    listen 80;
    server_name sub.domain.com www.sub.domain.com;

    return 301 https://sub.domain.com$request_uri;
}Please note that client_max_body_size 0; means there is no limit to the body size, feel free to adapt the value to your needs.
After adding or changing the NGINX config, restart with:
sudo nginx -t && sudo nginx -s reloadNow, you can test if everything is working fine by visiting the following URL in your browser:
https://sub.domain.com/v2/_catalogYou will be asked to enter your basic auth credentials (the username and password you used to generate the htpassed file earlier).
Conclusion
Like this, I can say we are successfully self-hosting our own private Docker Registry ready for production use.
Sources
- Docker Registry website.
- Docker Registry HTTP API specs.
As always, I hope you learned something.
Found this useful? feel free to share it with your friends.
Join the newsletter from here to notify you of new posts and updates.
Like the post? consider buying us a coffee ❤️.