How to Setup Redux in React Native
Redux, Redux Persist, Async Storage and React Native


Setting up Redux with persistence in local storage in a web React application is fairly easy, but in React Native, It's a slightly different process and tools.
In this post, we will see how to set up Redux with storage persistence in React Native.
Table of Contents
- Requirements
- Start a React Native Project
- Create a Counter Component
- Install Redux and Create a Store
- Create Counter Slice
- Use Redux in Counter Component
- Add Store Persistence
- Conclusion
- Sources
Requirements
- Basic React and React Native knowledge
- Basic Redux knowledge
- Basic Typescript knowledge
Start a React Native project
Obviously we need a project to work on, if you don't have a project for this, start from here.
Create a project with Typescript template:
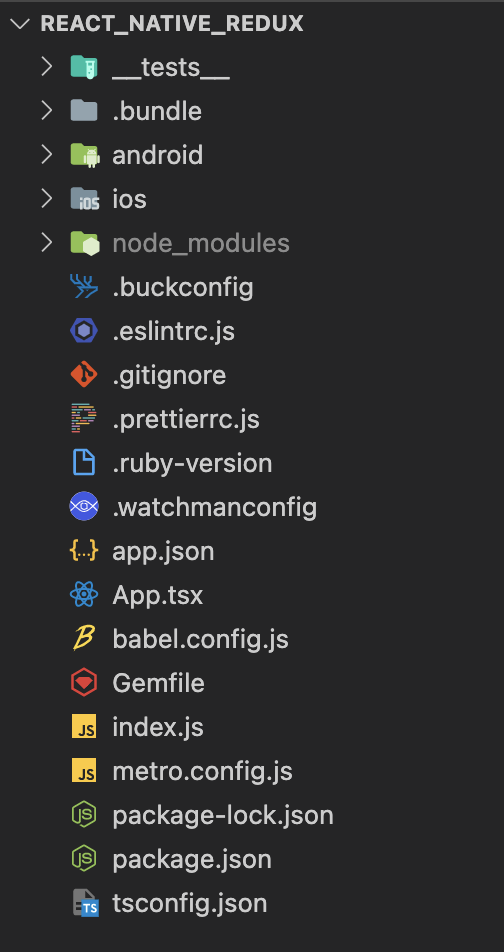
npx react-native init react_native_redux --template react-native-template-typescriptThis command creates a project with the following file structure:
Now let's move on to create some visuals.
Create a Counter component
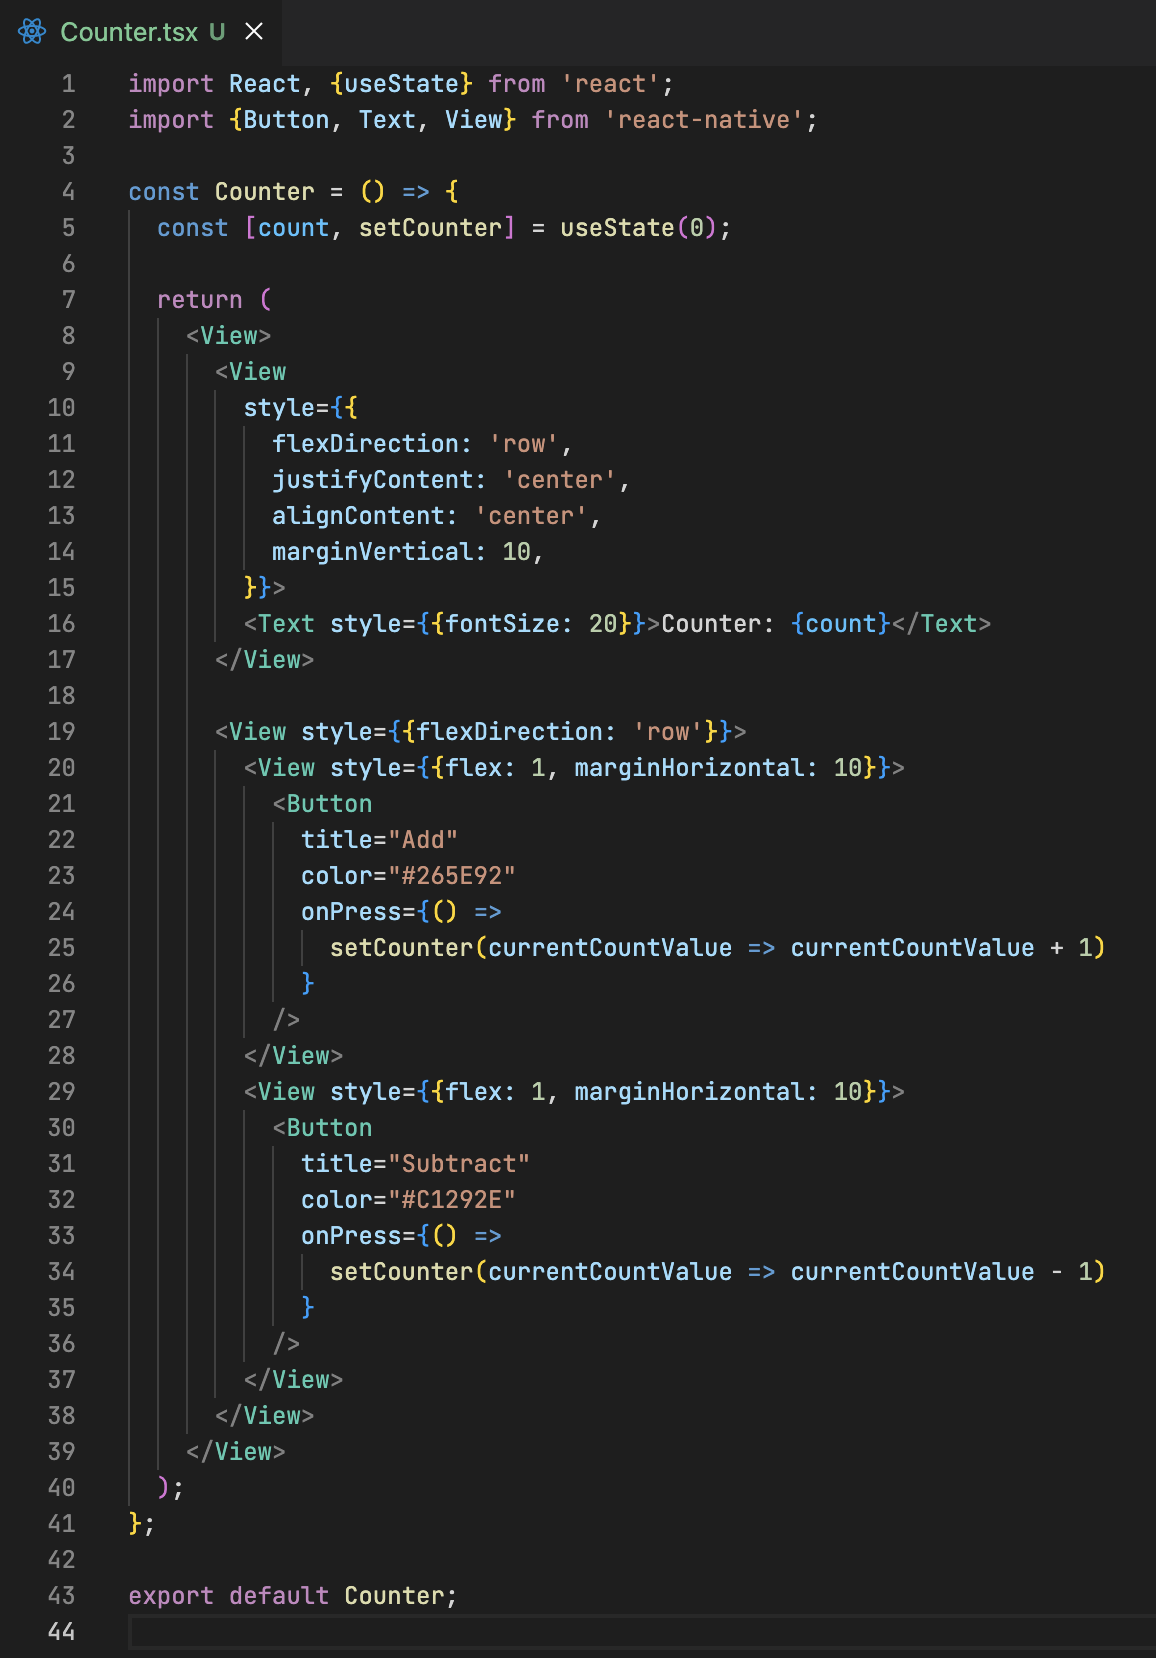
To demonstrates and test the Redux installation we will need to create a component for that, I chose a counter for its simplicity:
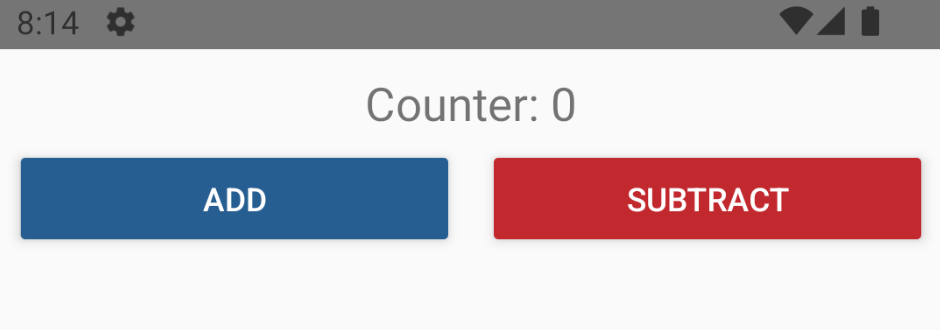
Visually, it should look like this:
Of course, you can run the app now with:
npm run androidInstall Redux and create a Store
Now we can install Redux, in this step we will be installing Redux Toolkit and React-Redux bindings packages:
npm i react-redux @reduxjs/toolkitNow for the store, create a file in the root of the project named store.ts and paste the following code in it:
import {configureStore} from '@reduxjs/toolkit';

export const store = configureStore({
  reducer: {},
});

export type RootState = ReturnType<typeof store.getState>;
export type AppDispatch = typeof store.dispatch;
This is an empty Store, we will populate it later on.
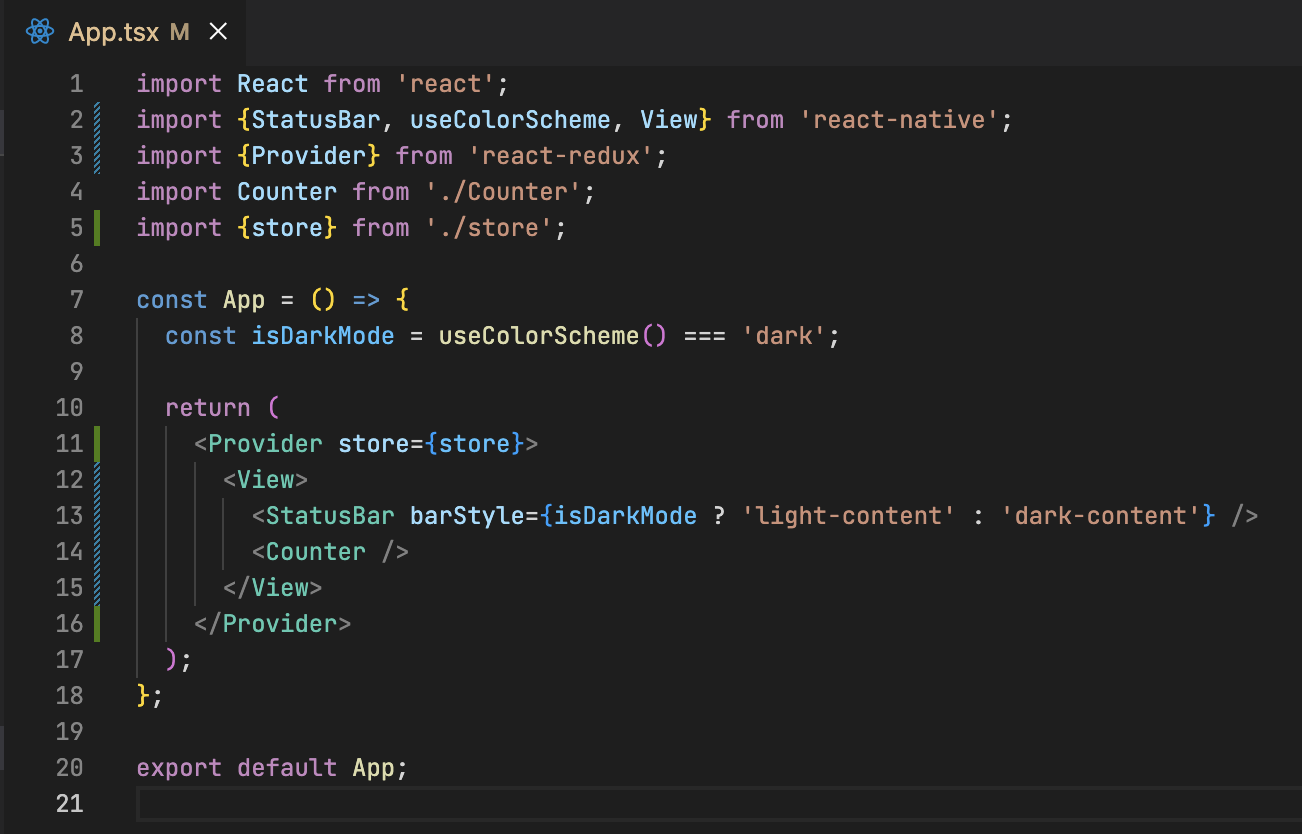
One last step is to wrap our main component with the store provider:
Create Counter Slice
Now it's time to integrate our Counter logic with Redux using the Slice file:
Create a file in the root project named counterSlice.ts with the following code:
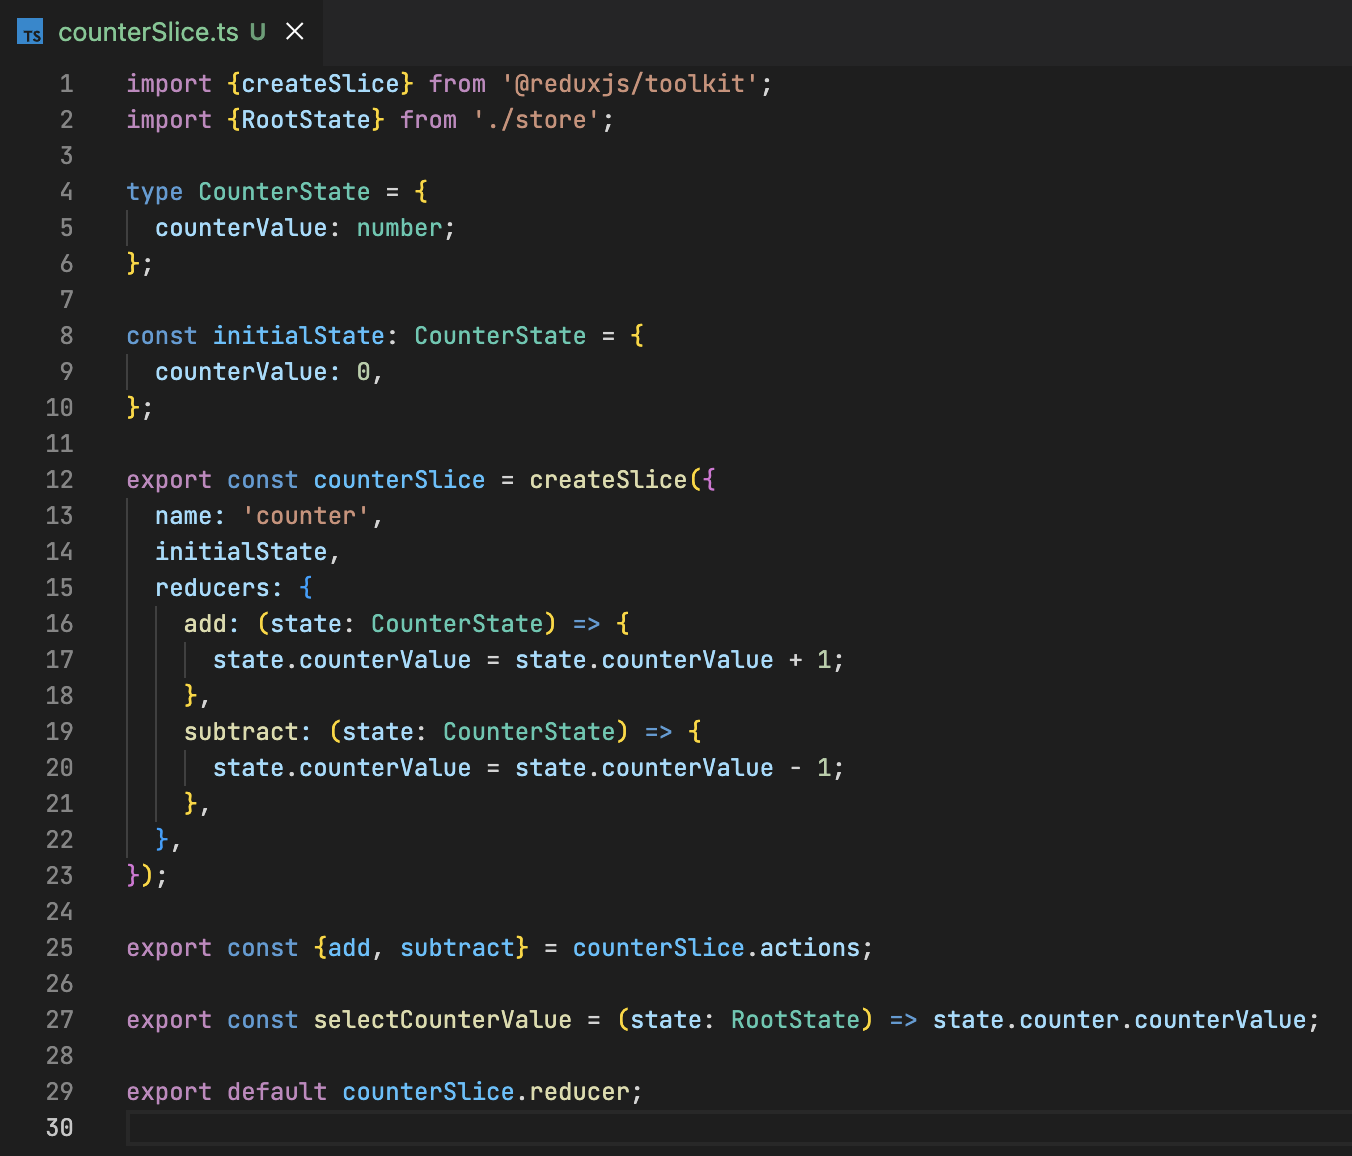
This file will export actions, selector and the reducer.
We also need to update the store with our reducer, like so:
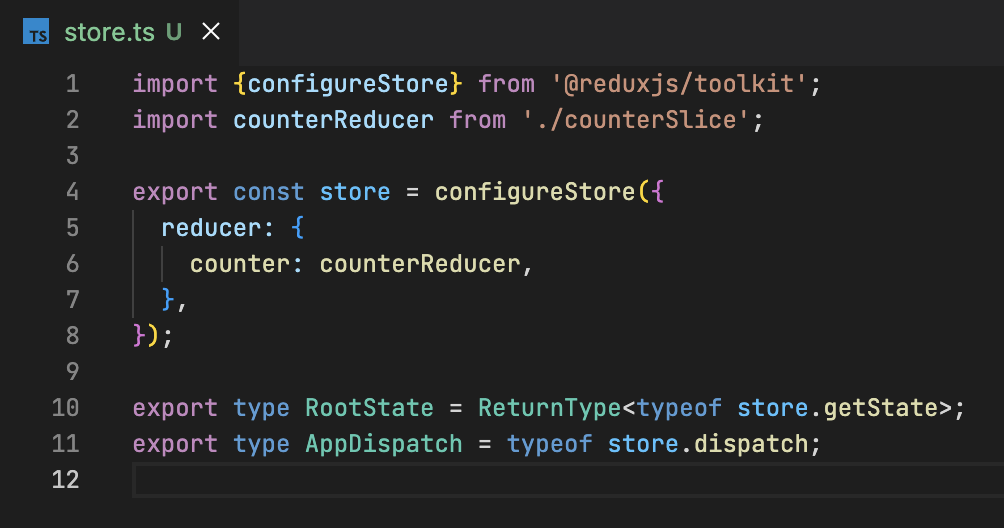
That's enough for now, let's move on to our Counter component.
Use Redux in Counter component
After we created our Slice file for the counter, we can update our component to use those actions.
We will use the selector to get the counter value and dispatch the exported actions to update it.
Have the component updated like so:
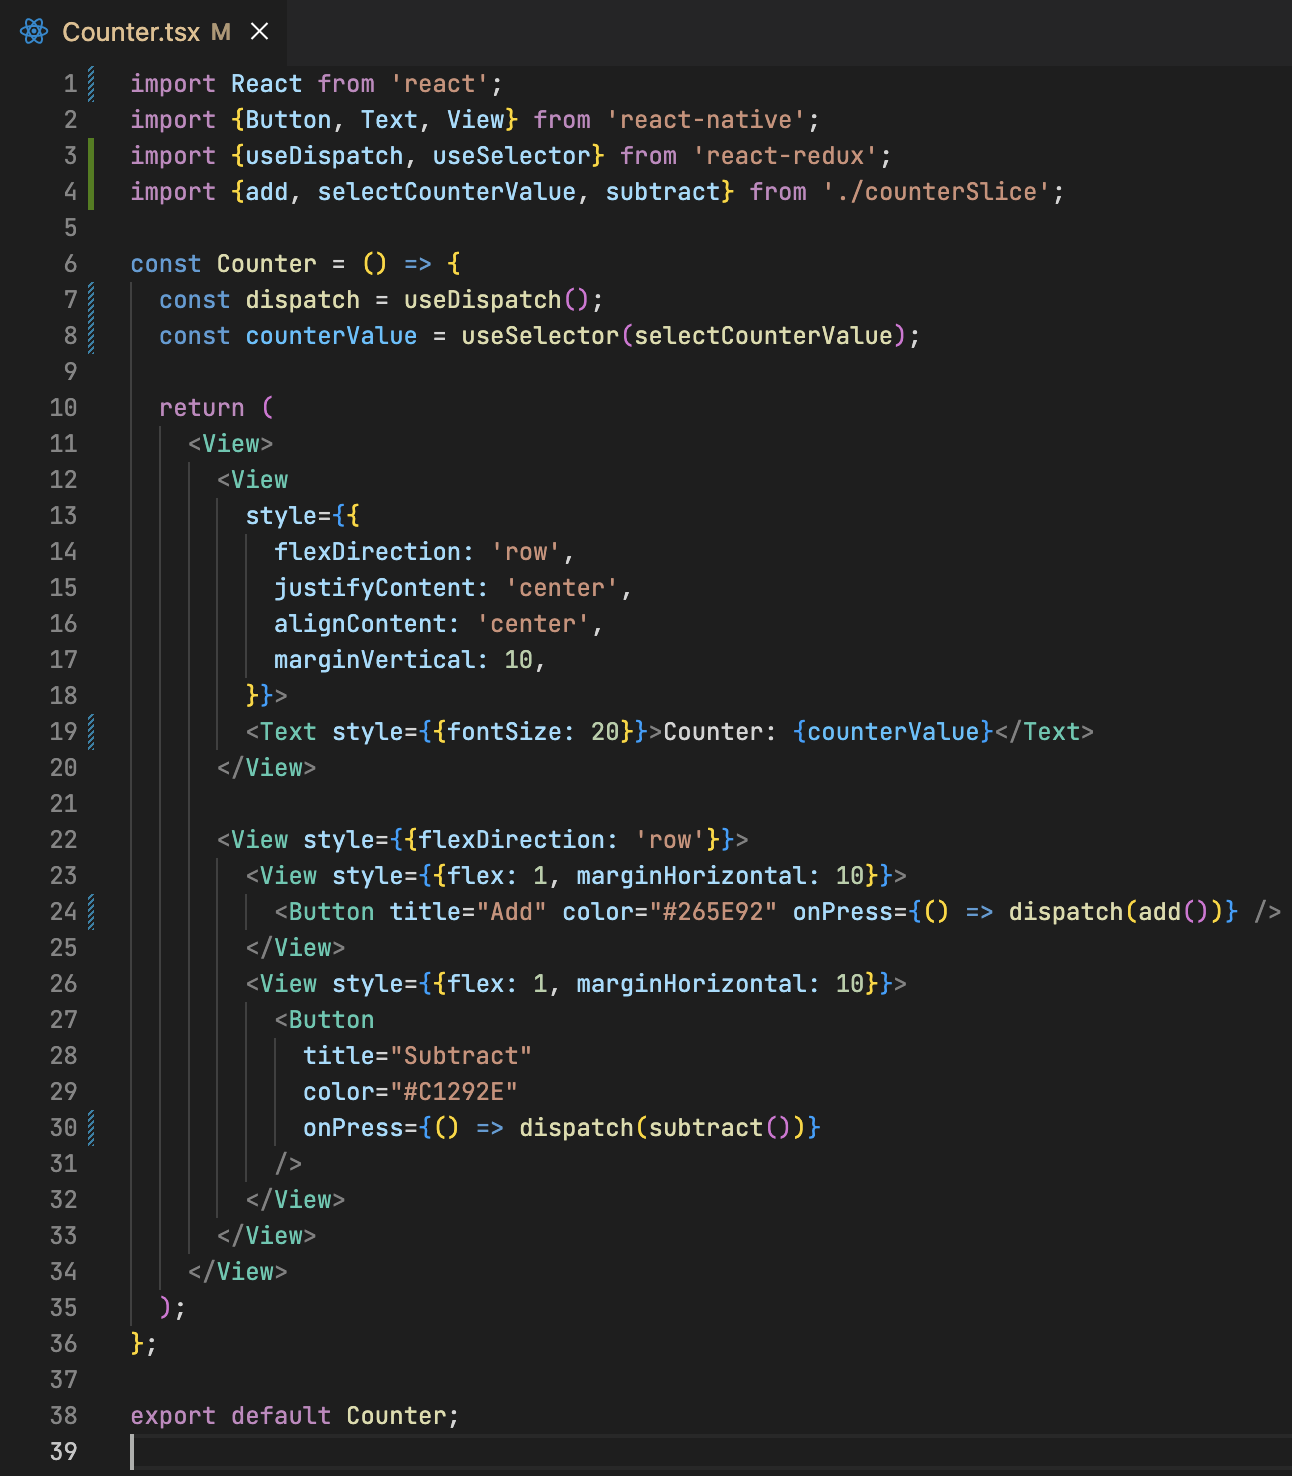
After adding the changes shown above, you can run the app and test it, it should run as if we are still using the useState hook.
But there is something we didn't add to our project, which is persistence, we will cover this in the next step.
Add Store Persistence
Now it's time to persist our store, but in React Native we are talking about a mobile device, so there is no local storage, in this case, we will be using two packages; Redux Persist to persist and rehydrate our store and Async Storage as storage adapter.
Let's start by installing the packages:
npm i redux-persist @react-native-async-storage/async-storageNow let's add persistence to our application:
In the Store file, we will have some changes:
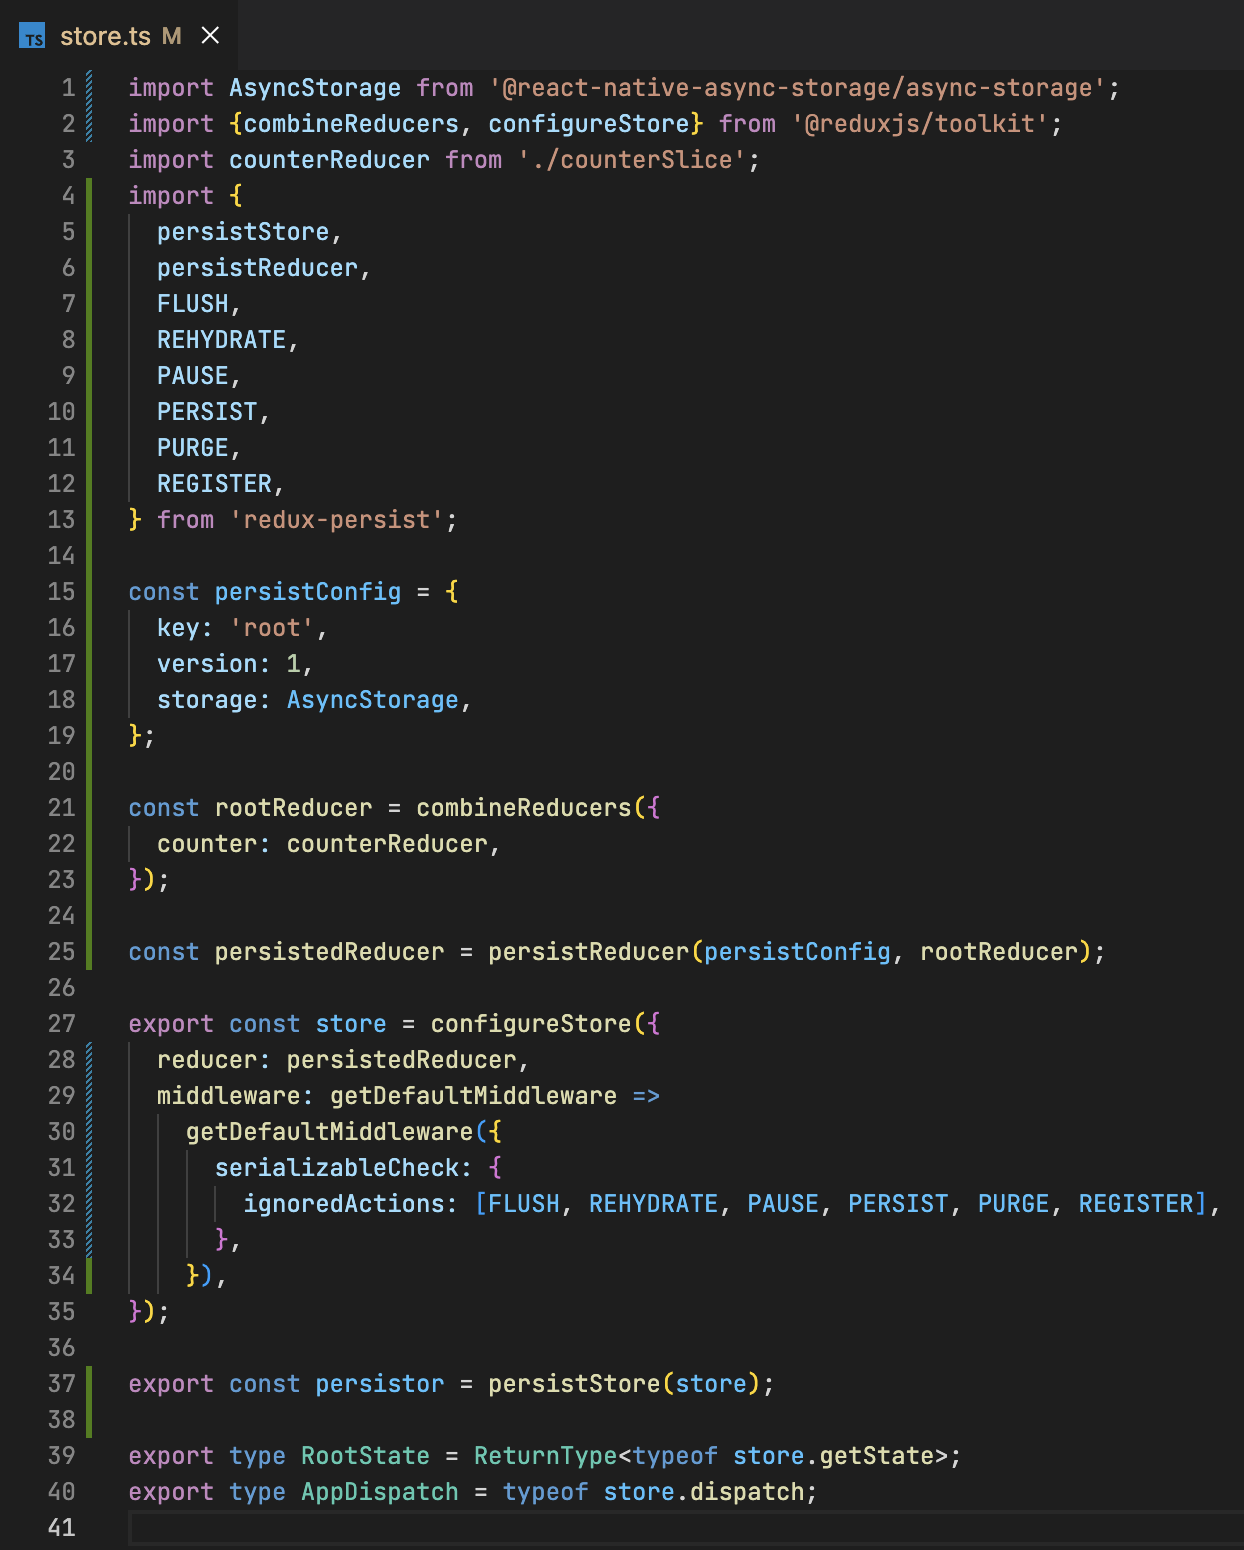
And we also need to wrap our main component with the PersistGate like so:
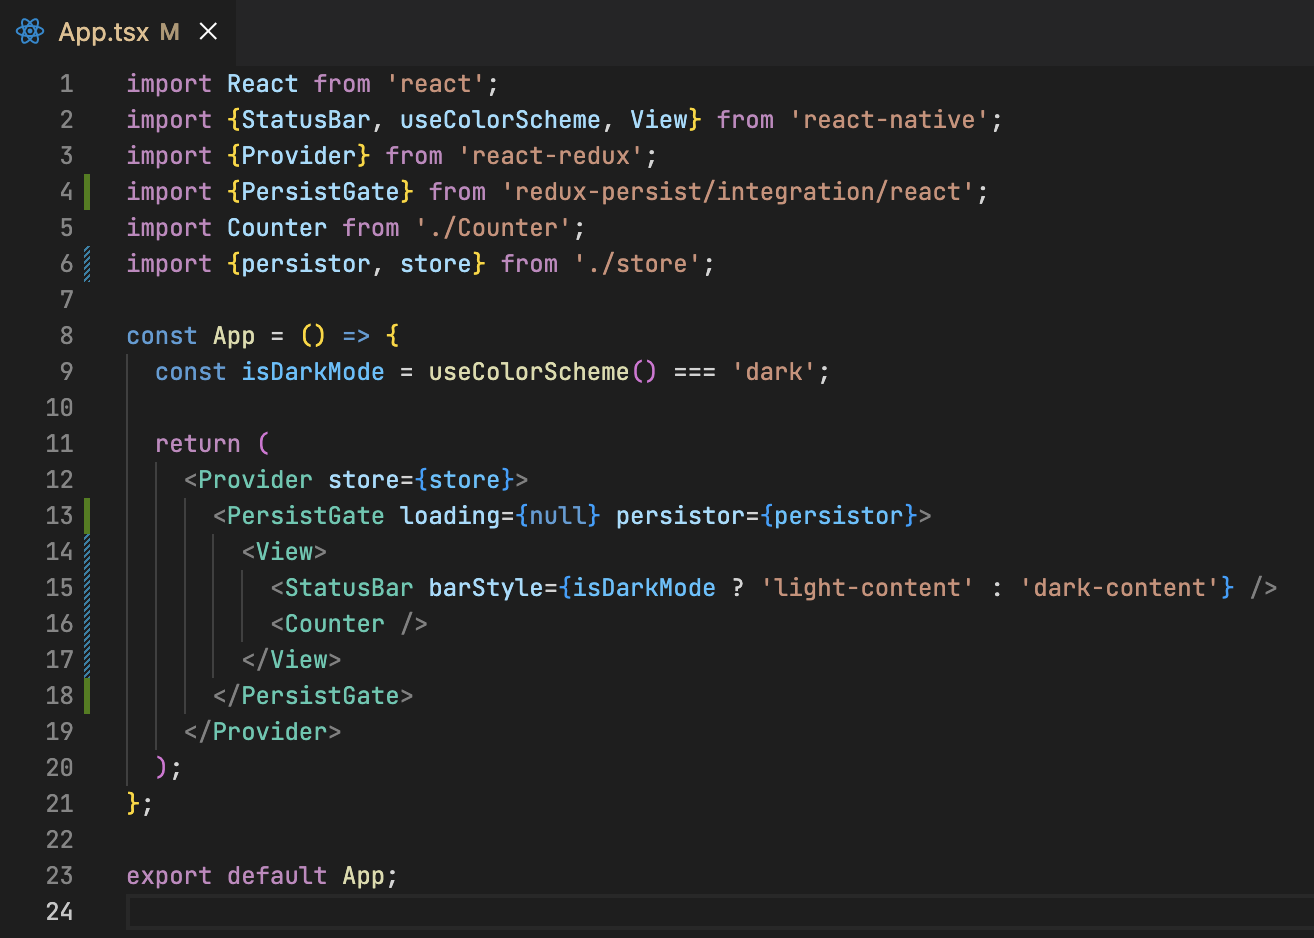
And now we should have our store persisted, you can test this by missing around with the counter, close the app, re-open it, and you should see the latest value persisted.
Conclusion
No doubt, it takes some effort to setup Redux in React Native, but it's totally worth it.
Sources
- React Native development environment setup.
- Redux Toolkit documentation.
- Redux Persist
- Async Storage
Source code can be found here.
As always, I hope you learned something.
Found this useful? feel free to share it with your friends.
Join the newsletter from here to notify you of new posts and updates.
Like the post? consider buying us a coffee ❤️.