Configure an Angular App to Support Multiple Environments
Add Multiple Environments to Your Angular App in Easy Steps


In an Angular app there are two different environments by default which are development and production but most of the time we want to build or start our apps in different environments for maybe testing or quality control.
In this post, we will see how to configure the Angular app to support multiple environments.
Table of contents
- Requirements
- Project Setup
- Project walk-through
- Add staging configuration
- Staging configuration explained
- Conclusion
- Sources
Requirements
- NodeJs
Project Setup
Assuming you have created an Angular project, if not run the followings commands to create a new project.
Open up a terminal and install the Angular CLI globally:
npm i -g @angular/cliThen create a project:
ng new my-appThe above will create a project named my-app, get into the app and open it with your preferred IDE or text editor.
cd my-app && code .Project walk-through
Locate and open the angular.json configuration file, it should be at the root of the project.
If we fold the main object keys we will see the following:
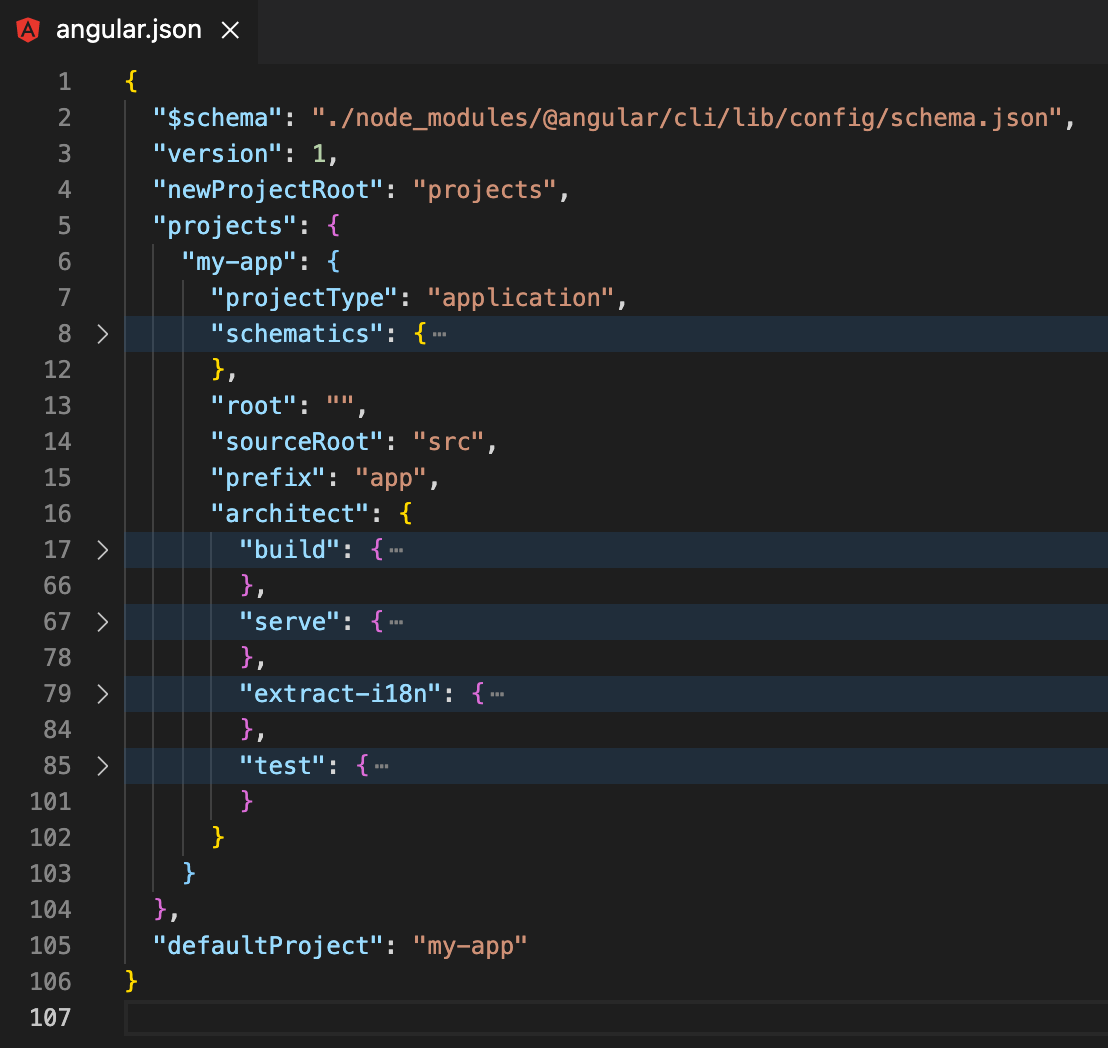
Now we will be working under the build key that can be found at:
projects > my-app > architect > build > configurationsHere is the default configurations object:
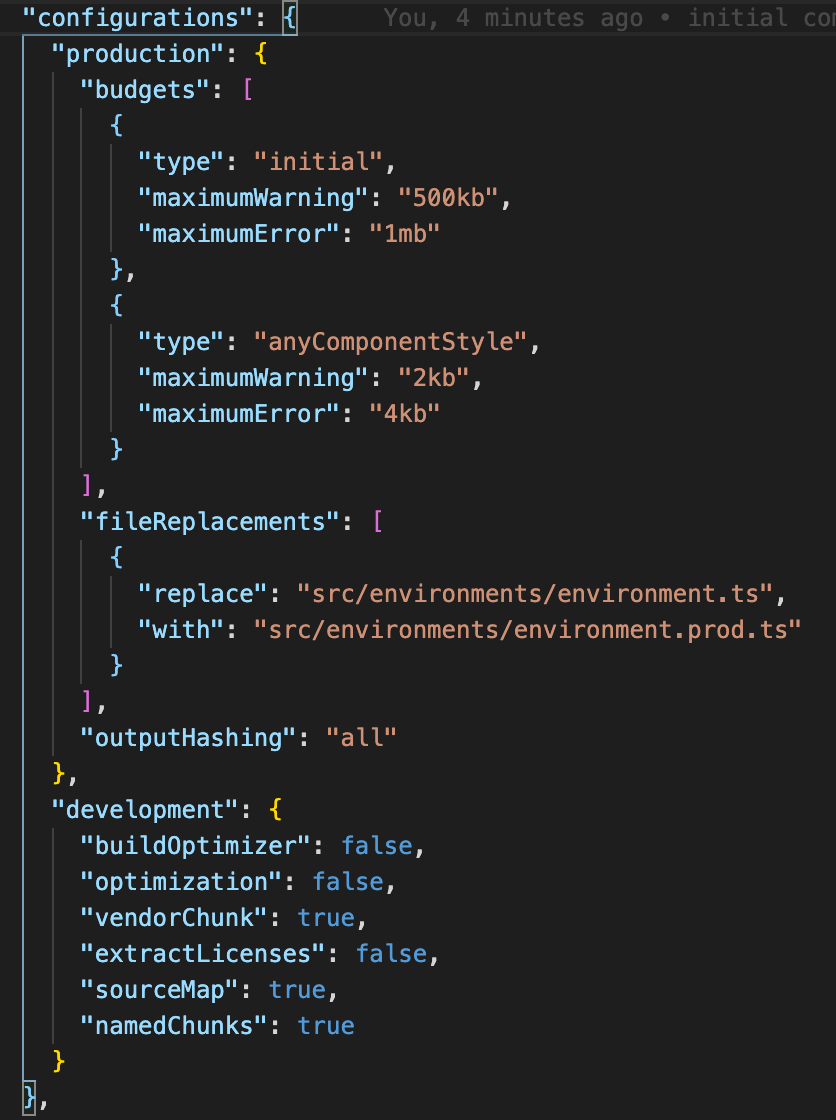
Now you can see the defaults, development, and production, we will be adding one more configuration for the sake of this post but you can always add as many as needed.
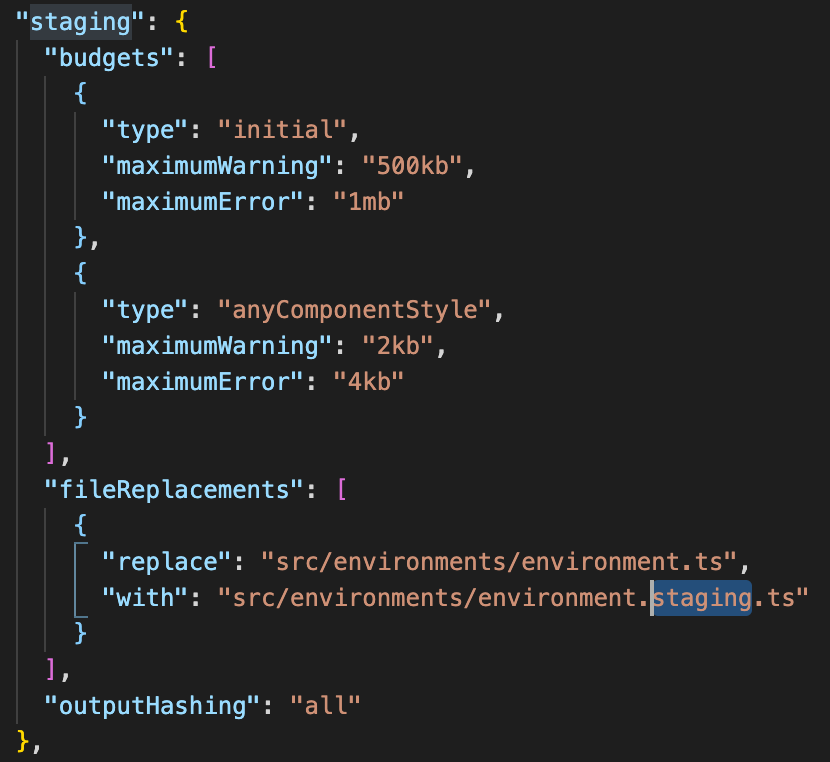
Add staging configuration
To make it an easy job to add a configuration just copy the production entry and paste it below the production and name the entry from production to staging and the other important part is to rename the environment file replacement from prod to staging.
Staging configuration explained
To explain what will happen when we added the above configuration, when we hit:
ng build --prodWe trigger the production build process and if we look closely it uses the development environment.ts file variables with environment.prod.ts variables, the same thing will happen to the staging configuration it will use with environment.staging.ts.
Now since this is cleared out, let's create the staging environment file, go to environments folder in the src folder and create it there as follows:
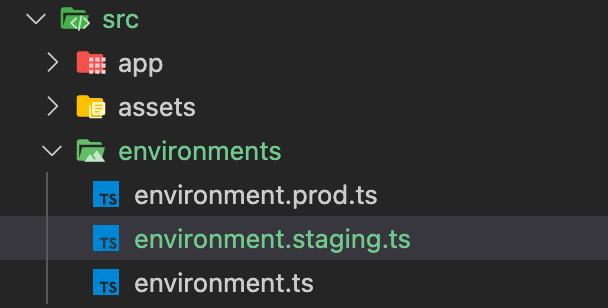
Copy and paste the production file's content into it, and now we have the staging environment set up.
What we need is to run the app with that configuration, to do so run the build command while specifying the configuration:
ng serve --prod --configuration stagingAnd to build the app with the staging configuration:
ng build --prod --configuration stagingConclusion
Voila, we are using a new configuration with different variables such as the API URL and much more.
Sources
- Angular documentation
As always, I hope you learned something.
Found this useful? feel free to share it with your friends.
Join the newsletter from here to notify you of new posts and updates.
Like the post? consider buying us a coffee ❤️.